TATTOO PHOTOGRAPHY & WORKING WITH YOUR SUBJECT

james nader photography blog - tattoo photography portraits
The biggest problem was in the subjects taking off their clothes in front of me, the equipment possibly looked like some gynaecological machine

People & Their Tattoo Art – Photographic Study Street Cast Models

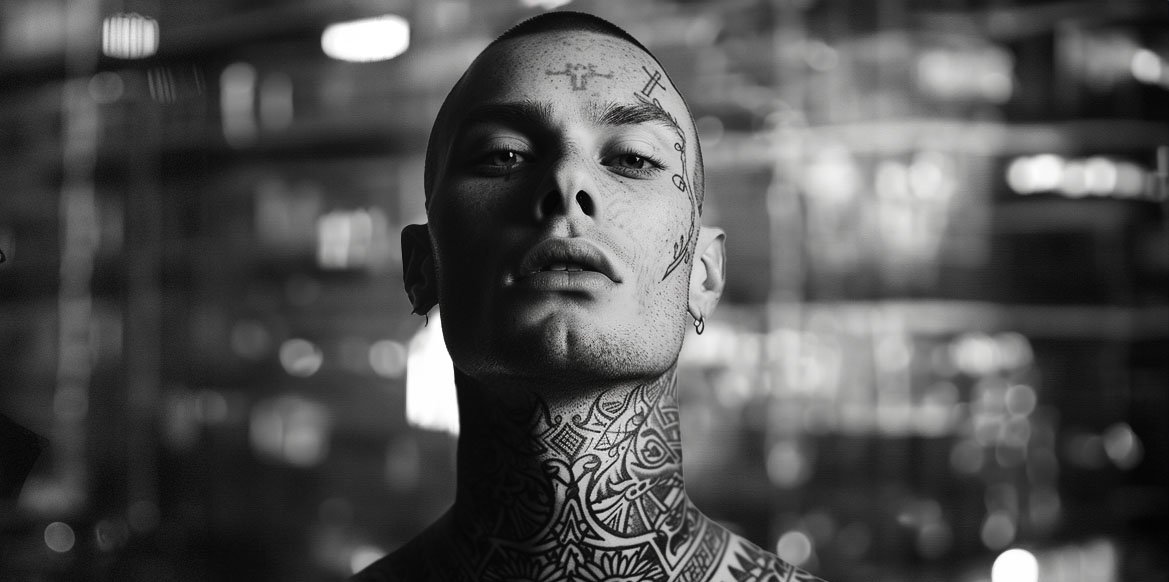
Capturing real moments and narrating compelling visual stories has always been my photography love. Working as a fashion and editorial photographer has taught me that photographing real people—and especially those who are sporting tattoos—allows me to delve into the complicated fabric of individuality and expression.

Tattoos intrigue me because they are works of art that are both highly personal and often symbolic. For someone like myself who wants to communicate stories through visuals, tattoos are a fascinating medium for expression.

Going beyond the typical fashion photography concepts, I am able to capture a wider range of people and their stories via my work by focussing on genuine people who have tattoos. I have been able to display various kinds of self-expression and question established beauty standards through this technique .

Also, the growing historical significance of tattoo art piques my interest in it. Photojournalism has given me a window into current social movements and fashions, especially with the increasing number of tattoos. Not only does this help me reach a greater number of people, but it also keeps my work relevant.

When it comes to lighting and composition, tattoos provide their own set of technical obstacles and opportunities. Because of this, I have to be creative in my approach so that I can bring out the details of the tattoo as well as the wearer’s character. This challenge motivates me to keep improving my skills and keeps my creative juices flowing.

My ultimate goal as a photographer is to capture genuine, unique subjects and turn everyday life into powerful photos that speak to both clients and viewers. This includes an attraction with tattoo art and real people. I’ve been able to figure out a niche for myself in the competitive field of fashion and editorial photography by using this method.


james nader photography blog - tattoo photography portraits 4

For some time I have had the idea to shoot some tattoo adorned people. We set up a very simple shoot with tattoo people who love their tattoo art and have them all over their body for all sorts of reasons. After watching the various TV shows regarding Tattoo Art I thought right let’s get on with it.

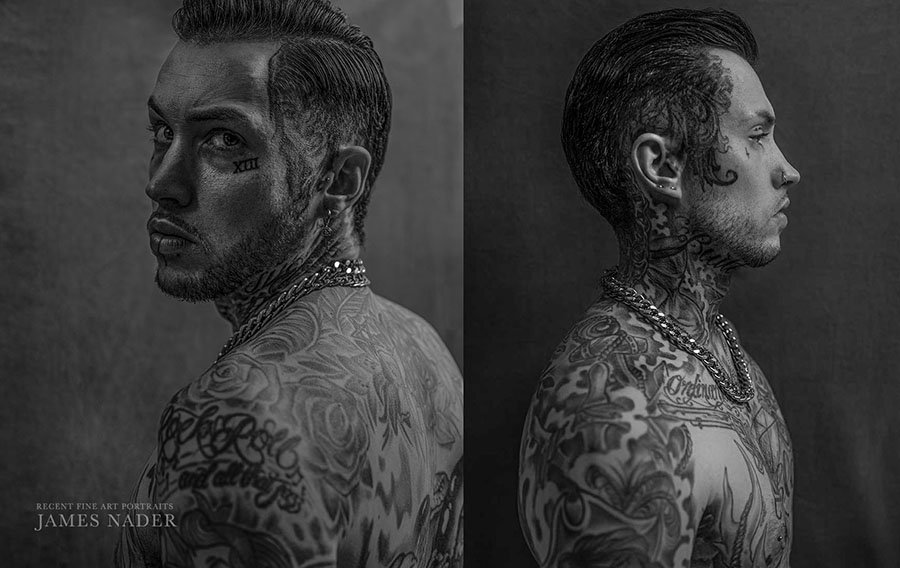
I wanted the images to be a complete representation of the person and their tattoo and cover this in about 10 minutes in front of the camera. The best way forward I thought was to completely strip the colour out of the images and turn it all into a black and white study and in my opinion, gave the whole look an edgy effect. I had also been given some new lighting from a top lighting company and thought it would be nice to try out the ring flash that had been given as part of the lighting kit freebie

tattoo photography fashion photographers blog


lighting diagram fashion lighting


tattoo photography fashion photographers blog


ON THE DAY

When we arrived at our location the room set we were using was only 10ft x 10ft so very small but we had only said we would turn up and shoot please can you help out with space as a studio was not necessary. Maybe it was we thought!  Once set up the plan was for the people to just roll up over a 4 hour period and we would just shoot them as they felt comfortable. The ring flash was set up and tested by Phil and we started. Most people were really nervous and I suppose they felt a little like going to the docs.

The biggest problem was in the subjects taking off their clothes and not feeling nude in front of me and the equipment which could possibly have looked like some gynaecological machine from the arc. After a brief chat with each of the subjects I managed to make then feel at ease and we started shooting the individual. It was amazing to me how they all seemed to be hiding behind the tattoo and what it meant, this was most evident when standing in front of me with the camera and light and them holding their bodies in a contorted covering up way.

SIMPLE PHOTOSHOP PROCESSING

The black and white images were later processed through Lightroom with some Analogue film presets and then pushed out into CS6 Photoshop to finish them off. This was the first time that I had used a ring flash and really liked the look. It is a look seen with David Lachapelle in his photo work plus many other photographers, but for sure I will be using it in some client work and in an editorial shoot at Dungeness in the Spring.

Once the guys were relaxed and told the story about why and where and what for about the tattoo they readily seemed to embrace the photography and surprisingly took all direction very well.


tattoo photography fashion photographers blog

TECH SPEC for this shoot


  • 10 x 10ft room with all items not removed!
  • small backdrop roll and stands
  • Nikon D3X  Nikon D800
  • Shutter: 1/125
  • Aperture: F11
  • Any Problems: cramped and  hot
  • Tattoo – Real People
  • TeamNader
  • Lit by Ringflash
  • Styling – models own Tattoo!
  • Makeup – none
  • Processed in – Lightroom and Adobe Photoshop CS6
Clean lighting matters. Next to exposure, good lighting eclipses everything when it comes to taking good photos of tattoos. Remember, skin is actually pretty reflective, and fresh skin will be glossy. It’s also full of pigment, so you want to make sure you don’t shoot it straight. To get that ideal, romantic photo of a pert new tattoo, you should make sure it’s lit with a diffused, shadow-killing light.

To minimise glare, then, make good use of the light coming in from your windows. This works well with even reasonably brightened rooms. To reduce the glare on your smartphone as well, try a similar strategy: just use less light. Of course, if sunlight is not an option, and you really need to read on your smartphone in a dark place, then, unfortunately, no easy quick-fixes exist. Those plethora of additional accessories will likely be necessary.

Locate Alternative Light Sources

Shoot a few different styles of tattoos with your chosen light source to see how it goes. Try different lighting techniques with different types of light sources: ring lights, spotlights, tripod lamps and natural light. Some tattoo artists also recommend an LED light panel as a constant, soft illumination that won’t drown the photo in light.

A well-lit scene requires careful editing.

Creating the image: be careful while altering your photos, tools to shift the tone of an image with colour and sharpen it are often required. Exposure to light may change the tone of your tattoo, which can necessitate the need to retouch an image to bring its colour back to life. And if you work in black and grey, you can enhance the contrast, turn up the fine details that possibly you want your clients would see

If you stick these pointers, you’ll have yourself a tattoo porfolio ready to send to clients worldwide. Oh, it’s very important to note at this point: when you’re at the beginner’s stage with tattoo photography, you need to be experimental. Treat it almost like a hobby. Play around with different lighting, framing and editing, until you find something you really enjoy and feel really happy with. Because, at the end of the day, if you’re happy, that’s all that matters. To watch the full


tattoo photography fashion photographers blog


lighting diagram fashion lighting


tattoo photography fashion photographers blog


ON THE DAY

When we arrived at our location the room set we were using was only 10ft x 10ft so very small but we had only said we would turn up and shoot please can you help out with space as a studio was not necessary. Maybe it was we thought!  Once set up the plan was for the people to just roll up over a 4 hour period and we would just shoot them as they felt comfortable. The ring flash was set up and tested by Phil and we started. Most people were really nervous and I suppose they felt a little like going to the docs.

The biggest problem was in the subjects taking off their clothes and not feeling nude in front of me and the equipment which could possibly have looked like some gynaecological machine from the arc. After a brief chat with each of the subjects I managed to make then feel at ease and we started shooting the individual. It was amazing to me how they all seemed to be hiding behind the tattoo and what it meant, this was most evident when standing in front of me with the camera and light and them holding their bodies in a contorted covering up way.

SIMPLE PHOTOSHOP PROCESSING

The black and white images were later processed through Lightroom with some Analogue film presets and then pushed out into CS6 Photoshop to finish them off. This was the first time that I had used a ring flash and really liked the look. It is a look seen with David Lachapelle in his photo work plus many other photographers, but for sure I will be using it in some client work and in an editorial shoot at Dungeness in the Spring.

Once the guys were relaxed and told the story about why and where and what for about the tattoo they readily seemed to embrace the photography and surprisingly took all direction very well.


tattoo photography fashion photographers blog

TECH SPEC for this shoot


  • 10 x 10ft room with all items not removed!
  • small backdrop roll and stands
  • Nikon D3X  Nikon D800
  • Shutter: 1/125
  • Aperture: F11
  • Any Problems: cramped and  hot
  • Tattoo – Real People
  • TeamNader
  • Lit by Ringflash
  • Styling – models own Tattoo!
  • Makeup – none
  • Processed in – Lightroom and Adobe Photoshop CS6

[/vc_column_text]
[/vc_column][/vc_row]
Clean lighting matters. Next to exposure, good lighting eclipses everything when it comes to taking good photos of tattoos. Remember, skin is actually pretty reflective, and fresh skin will be glossy. It’s also full of pigment, so you want to make sure you don’t shoot it straight. To get that ideal, romantic photo of a pert new tattoo, you should make sure it’s lit with a diffused, shadow-killing light.

To minimise glare, then, make good use of the light coming in from your windows. This works well with even reasonably brightened rooms. To reduce the glare on your smartphone as well, try a similar strategy: just use less light. Of course, if sunlight is not an option, and you really need to read on your smartphone in a dark place, then, unfortunately, no easy quick-fixes exist. Those plethora of additional accessories will likely be necessary.

Locate Alternative Light Sources

Shoot a few different styles of tattoos with your chosen light source to see how it goes. Try different lighting techniques with different types of light sources: ring lights, spotlights, tripod lamps and natural light. Some tattoo artists also recommend an LED light panel as a constant, soft illumination that won’t drown the photo in light.

A well-lit scene requires careful editing.

Creating the image: be careful while altering your photos, tools to shift the tone of an image with colour and sharpen it are often required. Exposure to light may change the tone of your tattoo, which can necessitate the need to retouch an image to bring its colour back to life. And if you work in black and grey, you can enhance the contrast, turn up the fine details that possibly you want your clients would see

If you stick these pointers, you’ll have yourself a tattoo porfolio ready to send to clients worldwide. Oh, it’s very important to note at this point: when you’re at the beginner’s stage with tattoo photography, you need to be experimental. Treat it almost like a hobby. Play around with different lighting, framing and editing, until you find something you really enjoy and feel really happy with. Because, at the end of the day, if you’re happy, that’s all that matters. To watch the full

Share post

There are no comments

Leave a Reply

Your email address will not be published. Required fields are marked *

Start typing and press Enter to search

Shopping Cart